



A dental insurance verification checklist helps front desk teams confirm patient eligibility, benefits, deductibles, annual maximums, waiting periods, frequency limits, and plan exclusions before the appointment. It gives the team a repeatable process, reduces last-minute surprises, improves patient cost conversations, and supports smoother billing after treatment.
Quick dental insurance verification checklist
Use this checklist before every appointment that involves insurance.
| Checklist item | What the front desk should confirm |
|---|---|
| Patient details | Full name, date of birth, phone number, and address |
| Subscriber details | Subscriber name, date of birth, member ID, and relationship to patient |
| Insurance card | Front and back of the current insurance card |
| Carrier details | Insurance company name, payer ID, group number, and plan type |
| Eligibility | Active status for the expected date of service |
| Effective date | When the policy became active |
| Termination date | Whether the plan has an end date on file |
| Coverage categories | Preventive, basic, major, periodontal, oral surgery, and orthodontic coverage if relevant |
| Deductible | Individual deductible, family deductible, and amount already met |
| Annual maximum | Total maximum, amount used, and remaining benefit |
| Frequency limits | Exams, cleanings, X-rays, crowns, fluoride, sealants, and perio maintenance |
| Waiting periods | Preventive, basic, major, orthodontic, or plan-specific waiting periods |
| Exclusions | Missing tooth clause, downgrades, age limits, replacement rules, and non-covered services |
| Secondary insurance | Coordination of benefits details when the patient has more than one plan |
| Documentation | Portal source, call reference, representative name, date verified, and notes |
Why front desk teams need a checklist?
Front desk teams carry a heavy workload.
They answer calls, greet patients, schedule appointments, collect forms, verify insurance, manage cancellations, and support treatment coordinators. When the schedule gets busy, insurance verification can become rushed or inconsistent.
That is where problems begin.
A patient may arrive with inactive coverage. The subscriber may not match the payer record. A plan may have a waiting period. A crown may have a frequency limit. A deductible may not be met. If the team misses one detail, the patient estimate may become unclear and the billing team may need extra follow-up later.
A checklist helps the front desk work with structure instead of memory.
It also makes training easier. New staff members can follow the same process as experienced team members. Office managers can review gaps faster. Billing teams can trust the notes because everyone uses the same format.
What is a dental insurance verification checklist?
A dental insurance verification checklist is a structured list of items that a dental office checks before a patient’s appointment. It helps the team confirm whether coverage appears active, what benefits may apply, what limitations may affect treatment, and what information should be documented.
The checklist does not guarantee insurance payment.
It supports better estimates and cleaner communication. Final payment can still depend on payer review, plan rules, eligibility at the time of service, claim details, clinical documentation, and other factors.
Step-by-step checklist for front desk teams
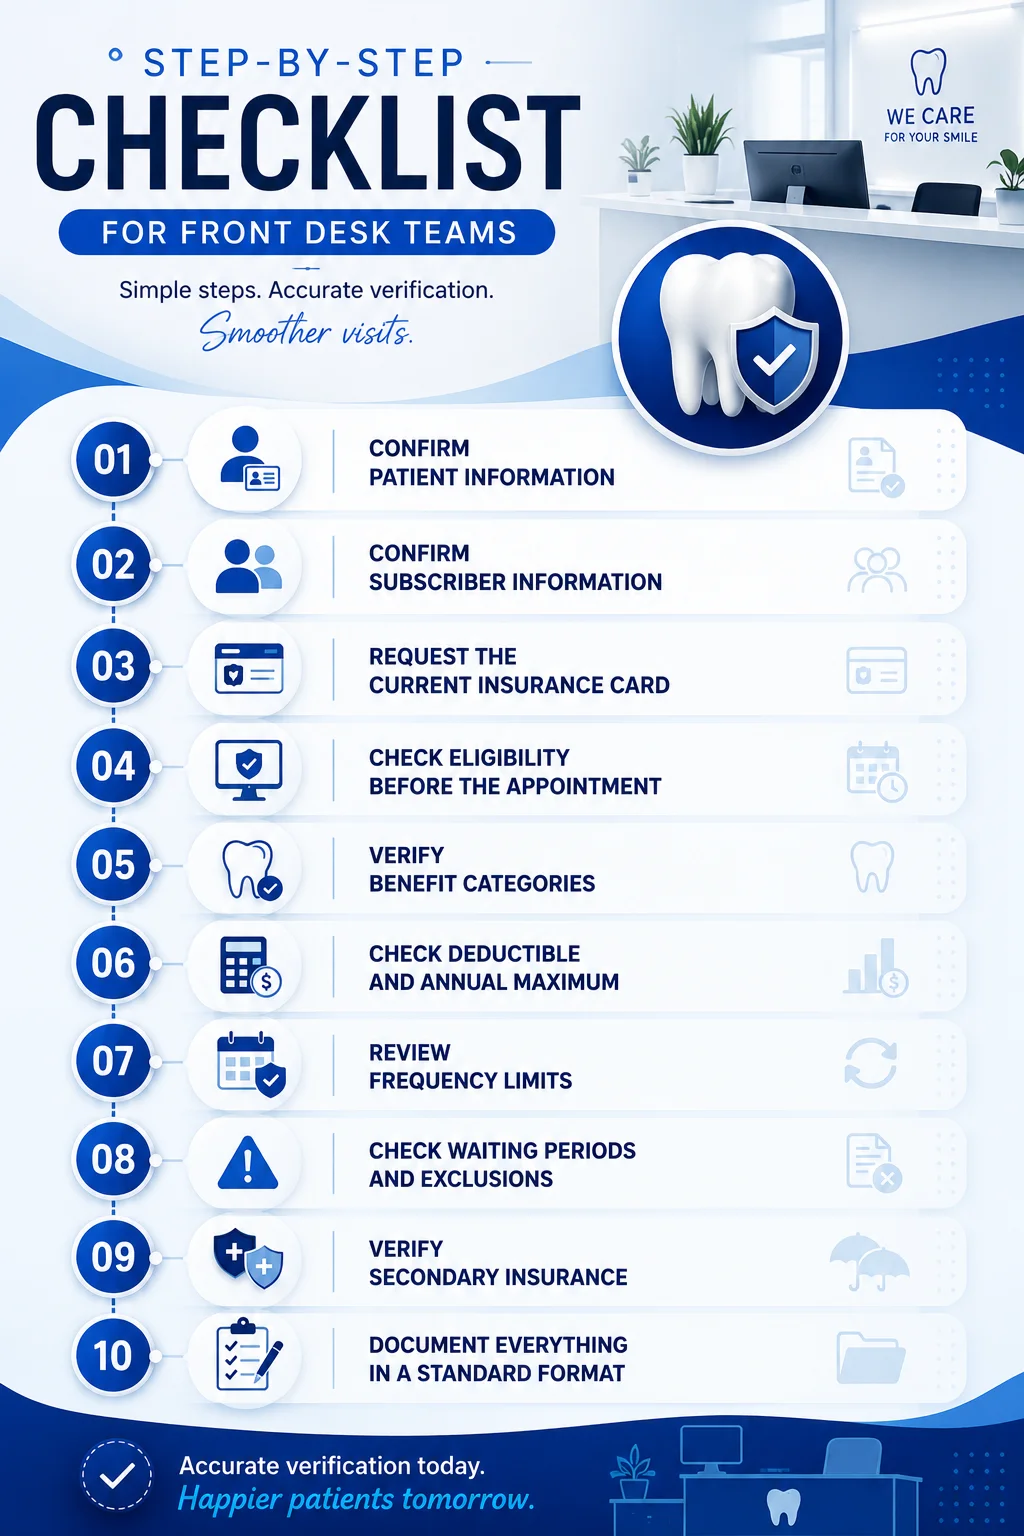
Step 1: Confirm patient information
Start with the patient’s personal details.
Check:
- Full legal name
- Date of birth
- Phone number
- Address
- Email address
- New or returning patient status
The patient name must match the payer record as closely as possible. Nicknames, spelling errors, and outdated information can slow down verification.
Example:
If the patient gives the name “Mike” but the payer has “Michael,” the portal may not return the correct eligibility result. A simple front desk confirmation can prevent wasted time.
Step 2: Confirm subscriber information
The subscriber is the person who holds the insurance policy.
For many dental patients, the subscriber may be a spouse, parent, or employer-linked member. The front desk should confirm:
- Subscriber full name
- Subscriber date of birth
- Member ID
- Group number
- Patient relationship to subscriber
- Employer name, when needed
- Subscriber address, if required by the payer
This step matters because many eligibility issues come from mismatched subscriber data.
Step 3: Request the current insurance card
Ask for the front and back of the insurance card.
The back of the card often includes payer contact numbers, claims mailing information, electronic payer details, and plan instructions. A photo of only the front may not be enough.
For new patients, collect the card before the first visit. For returning patients, ask if their insurance has changed since the last appointment.
A simple question helps:
“Has your dental insurance changed since your last visit?”
This prevents the team from verifying an old plan.
Step 4: Check eligibility before the appointment
Eligibility tells the office whether the patient’s plan appears active for the expected date of service.
Front desk teams usually check eligibility through a payer portal, clearinghouse, practice management system integration, or a phone call to the insurance company.
Check:
- Active or inactive status
- Effective date
- Termination date, if available
- Plan type
- Network information, when relevant
- Patient and subscriber match
- Dependents covered under the plan
Do not stop at active status. Active coverage does not mean the planned treatment is covered.
Step 5: Verify benefit categories
Benefit verification shows how the plan may cover different types of dental services.
Check the categories that match the appointment type.
For hygiene appointments, review:
- Exams
- Cleanings
- Bitewing X-rays
- Full mouth X-rays or panoramic X-rays
- Fluoride
- Sealants, when relevant
For restorative treatment, review:
- Fillings
- Crowns
- Build-ups
- Root canals
- Extractions
- Oral surgery
- Dentures or partials
- Implant-related benefits, when relevant
For periodontal visits, review:
- Scaling and root planing
- Periodontal maintenance
- Full mouth debridement
- Frequency limits
- History requirements, if available
The goal is not to collect every possible plan detail. The goal is to collect the details that support the scheduled visit and expected treatment conversation.
Step 6: Check deductible and annual maximum
This step helps the team estimate patient responsibility more clearly.
Confirm:
- Individual deductible
- Family deductible
- Deductible met
- Deductible remaining
- Annual maximum
- Amount used
- Remaining maximum
- Benefit year start and end date
Front desk teams should document this clearly because treatment coordinators often rely on these numbers when presenting estimates.
Example:
A patient may have 80 percent basic coverage, but if the deductible has not been met, the estimate may change. If the annual maximum is almost used, the patient may owe more than expected.
Step 7: Review frequency limits
Frequency limits tell the office how often a service may be covered.
Common examples include:
- Two cleanings per benefit year
- Exams once every 6 months
- Bitewing X-rays once per year
- Full mouth X-rays once every 3 to 5 years
- Crown replacement after a certain number of years
- Fluoride coverage only under a certain age
- Periodontal maintenance at specific intervals
Plan rules vary. The front desk should verify the details directly with the payer or portal instead of assuming one standard rule applies to every patient.
Step 8: Check waiting periods and exclusions
Waiting periods and exclusions often cause patient frustration when they are missed.
Check for:
- Preventive waiting periods
- Basic service waiting periods
- Major service waiting periods
- Orthodontic waiting periods
- Missing tooth clause
- Replacement clauses
- Downgrades
- Age restrictions
- Non-covered services
- Alternate benefit rules
A treatment may appear covered at first glance, but an exclusion can change the estimate.
This is especially important for crowns, bridges, dentures, implants, orthodontics, and replacement work.
Step 9: Verify secondary insurance
If the patient has more than one dental insurance plan, check coordination of benefits.
Confirm:
- Primary insurance
- Secondary insurance
- Subscriber details for both plans
- Coordination of benefits rules
- Birthday rule when dependent coverage applies
- Remaining benefit under each plan, when available
Secondary insurance can help patients, but it can also create billing confusion if the order of coverage is wrong.
Step 10: Document everything in a standard format
Clear documentation protects the workflow.
Every verification note should include:
- Date verified
- Source of verification
- Payer portal name or phone number used
- Representative name, if verification was done by phone
- Reference number, if provided
- Eligibility status
- Benefit details
- Deductible details
- Annual maximum details
- Frequencies
- Waiting periods
- Exclusions
- Secondary insurance notes
- Any unclear or pending items
Avoid short notes like “active” or “verified.”
Those notes do not help the billing team, treatment coordinator, or office manager.
Need a cleaner verification workflow?
Improve Your Dental Insurance Verification Workflow
Mergant Support can review your current dental insurance verification checklist and show where your front desk may be losing time, missing details, or creating avoidable billing friction.
Book a Free Checklist ReviewDental insurance verification form template
A simple dental insurance verification form should include the sections below.
| Form section | Fields to include |
| Patient information | Name, date of birth, contact information |
| Subscriber information | Name, date of birth, ID, group number, relationship |
| Plan information | Carrier, payer ID, plan type, employer, effective date |
| Eligibility | Active status, date checked, termination date if available |
| Benefits | Preventive, basic, major, perio, oral surgery, orthodontics |
| Financial details | Deductible, deductible met, annual maximum, remaining benefits |
| Limitations | Frequencies, waiting periods, exclusions, downgrades |
| Secondary insurance | Primary plan, secondary plan, coordination notes |
| Verification record | Portal, call reference, rep name, verified by, date verified |
A form keeps the process consistent. It also helps new team members learn faster.
Common mistakes front desk teams should avoid
| Mistake | Why it causes problems | Better approach |
| Checking only active status | The patient may be eligible but not covered for the planned service | Verify benefits and service-specific limits |
| Verifying on the same day | The team has little time to fix missing details | Verify 24 to 72 hours before the visit when possible |
| Using unclear notes | Billing and treatment teams cannot trust the information | Use a standard note format |
| Forgetting frequency limits | Patients may expect coverage that is not available yet | Check service history and plan frequency |
| Missing waiting periods | Major or basic treatment may not be covered yet | Ask directly about waiting periods |
| Ignoring secondary insurance | Claims may go out in the wrong order | Confirm primary and secondary coverage |
| Promising exact payment | Insurance payment depends on payer review | Present insurance amounts as estimates |
| Not updating changed plans | Old information creates avoidable claim issues | Ask returning patients about insurance changes |
In-house checklist vs outsourced verification support
Some practices keep verification fully in-house. Others outsource it to reduce front desk pressure. Many use a hybrid model.
| Option | Best for | Main benefit | Main challenge |
| In-house checklist | Small offices with manageable schedules | Full internal control | Staff can get interrupted easily |
| Software-assisted checklist | Offices that want faster eligibility checks | Saves time on basic checks | May miss detailed payer limitations |
| Outsourced verification support | Busy practices with high patient volume | Reduces front desk workload | Requires onboarding and clear communication |
| Hybrid workflow | Practices that want control plus extra help | Flexible and scalable | Needs clear task ownership |
A checklist improves any model. Even if a practice outsources verification, the internal team still needs a clear handoff process.
When should a dental office outsource insurance verification?
A dental office should consider outsourcing when verification work starts to slow down the front desk, confuse patients, or create billing rework.
Common signs include:
- Staff verify insurance at the last minute
- New patient details are often incomplete
- Treatment coordinators lack benefit information
- Patients often question estimates
- Billing teams spend too much time correcting eligibility issues
- The office manager sees inconsistent notes
- The schedule has grown faster than the admin team
- Staff turnover affects verification quality
- The practice wants structure without hiring another employee
Outsourcing dental insurance verification can help practices create a more stable process. It can also reduce staffing burden while keeping the front desk focused on patients, scheduling, and communication.
How Mergant Support helps front desk teams
Mergant Support helps US-based dental practices manage insurance verification with structured remote support.
The goal is practical. Help your team verify earlier, document clearly, reduce front desk interruptions, and support better communication between scheduling, treatment coordination, and billing.
Mergant Support can help with:
- New patient insurance verification
- Returning patient eligibility checks
- Benefit breakdowns
- Deductible and annual maximum review
- Frequency limit checks
- Waiting period and exclusion review
- Secondary insurance verification
- Verification note updates
- Daily schedule-based verification support
- Coordination with dental billing and AR recovery workflows
Mergant Support works as a professional operational support partner, not a temporary task provider. The service is built for dental offices that want consistency, clear processes, and reliable support without adding more in-house hiring pressure.
Ready to Simplify Insurance Verification?
Let Your Dental Team Focus on Patients, Not Payer Follow-Ups
Insurance checks, benefit details, deductibles, and coverage limits can slow down your front desk before the day even starts.
Mergant Support helps dental practices review their verification workflow, identify missed steps, and build a cleaner process that reduces admin pressure and supports better patient communication.
Book a Free Verification Workflow ReviewFAQs
What is a dental insurance verification checklist?
A dental insurance verification checklist is a structured list of items front desk teams review before appointments. It usually includes eligibility, benefits, deductibles, annual maximums, frequency limits, waiting periods, exclusions, and documentation details.
What should front desk teams verify before a dental appointment?
They should verify patient details, subscriber information, active coverage, plan benefits, deductible, annual maximum, frequency limits, waiting periods, exclusions, and secondary insurance when applicable.
Is dental eligibility verification the same as benefit verification?
No. Eligibility verification checks whether coverage appears active. Benefit verification reviews what the plan may cover and what limits may apply to the scheduled treatment.
How early should dental insurance be verified?
Many practices verify 24 to 72 hours before the appointment. The best timing depends on schedule volume, payer access, staffing, and the type of treatment planned.
Can dental insurance verification guarantee payment?
No. Verification helps create better estimates, but final payment depends on payer review, plan rules, eligibility at the time of service, documentation, and claim processing.
Should dental offices use verification software?
Software can help with faster eligibility checks, but many practices still need human review for detailed benefits, payer calls, exclusions, and treatment-specific notes.
When should a practice outsource dental insurance verification?
A practice should consider outsourcing when front desk staff are overloaded, verifications are inconsistent, benefit notes are unclear, or insurance issues are affecting patient estimates and billing workflows.